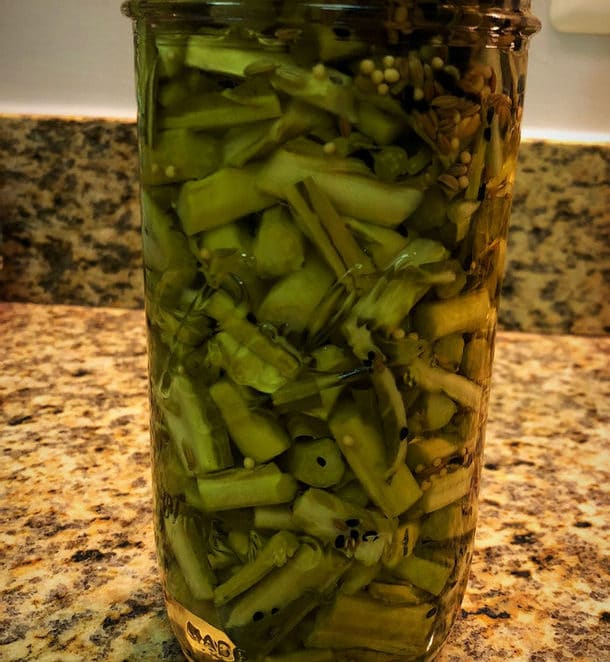
More reasons to #SaveTheStems! Thanks to EOT reader Stacy C., of Washington, D.C., for sharing this recipe!
The scene: New Years Day. Stacy is starting the year off right with a cozy meal of collard greens and black-eyed peas.
While it might be easy to just toss the stems from those collards, Stacy sees potential. She sees her 2018 future and that future includes Pickled Collard Stems.
They’re tangy, crunchy and great for healthy snacking, especially when it’s January and we’re all trying very hard.
Inspired by pickled collard stems first served during #RescueDishDC at Washington, D.C.’s Teaism restaurant, Stacy took to the internet and found guidance in a number of places, like Phickle, BakedGreens, and CharlieEats.
She opted for a refrigerator pickle, “so I didn’t have to worry too much about food safety, pressure canning, or botulism!” Compared with other kinds of pickles, fridge pickles are easier to make and don’t require fermentation or other special techniques.
In fact, fridge pickles can be ready in just eight hours. The only caveat is that they aren’t designed to last as long as traditional pickles, and their staying power will depend on the relative quantity of vinegar and other variables.
Here’s how Stacy worked her magic:
Print
Collard Stem Fridge Pickles
Description
A great use for stems from collard greens, kale or Swiss chard!
Ingredients
- Stems. From a bunch of collard greens. Chard or kale stems would work well too.
- Vinegar of any type. You’ll want enough to cover your stems in whatever jar(s) you’ve selected for storing your pickles.
- Salt. To taste. Or, follow Smitten Kitchen’s lead and use 3 teaspoons Kosher salt for every half cup of white vinegar.
- Sugar. Stacy didn’t use sugar, but some recipes call for it. This Food52 recipe suggests one part sugar and one part water to every three parts rice vinegar.
- Bay leaf. Not required, but a great flavor addition. Stacy didn’t boil her bay leaf with the vinegar, but instead left it in the jar with the stems. Though you could boil it too.
- Spices. Ideally in seed form. Peppercorns are essential. Stacy also used panch phoron, a Bengali mix of cumin seeds, fennel seeds, fenugreek seeds, black mustard seeds and nigella seeds. She didn’t have a packet of mustard seeds, which her original recipe called for, but such seeds were included in the panch phoron she had on hand. You can play with whatever spice mixture sounds good to you. Most recipes tend to suggest using whole spices (i.e. peppercorns instead of ground pepper). That will prevent your brine from being clouded by tiny spice particles.
Instructions
- Chop your stems to a length that will work well for you. You could go bite size for salad or sandwich add-ons, or keep them long for pickle-spear-like snacking.
- Put the stems in a glass jar that has a tight-fitting lid.
- Add a bay leaf to the jar.
- Boil the vinegar with the spices.
- Once the vinegar starts to boil, pour it into the jar and screw on the lid. Pouring hot vinegar over the veggies will cause them to acidify faster, which will extend their shelf life. A high ratio of vinegar will also extend shelf life. (A big thank you Elizabeth Andress of the National Center for Home Food Preservation for consulting with EatOrToss on this!)
- Store in the fridge. Your pickles will be ready for snacking, adding to salads or whatever else you’d like, in about 24 hours.
Notes
And, once you finish the pickles, make sure to use the juice!
Stacy also has this helpful hint:
Just don’t get lazy and bring the whole thing to work with you because you couldn’t be bothered to scoop out the last of the pickles. Because you might drop the jar on the metro platform and have to throw away a shopping bag of broken glass that also had the rest of your lunch in it, and you will have to explain to the station attendant why she should put a wet floor sign on the platform and why you and the platform smell like vinegar. I mean, hypothetically this could happen to you.
We’ll certainly be careful when traveling public transit with our fridge pickles. Thanks Stacy!

